Fixel Zone Selector 2 - User Guide 5 April 2020

Fixel Zone Selector 2 - Simple, Smart & Effective Zone System Luminosity Masks Generator Plug In for Adobe Photoshop - User Guide
Introduction
Fixel Zone Selector 2 is a Luminosity Mask generator. It is implemented as a Plug In with the highest quality and accuracy in mind.
The user experience was designed to mimic Ansel Adams’s Zone System by dividing the tonal range into 11 zones. The user is able to generate a mask by any combination of the zones.
Fixel Zone Selector 2 is the 2nd generation of the Fixel Zone Selector family.
This version adds the following features:
- Updated Algorithm
We have tweaked the algorithm to produce higher quality mask where we started with the highest quality to begin with. - Source Channel Selection
The user can select the source channel for the mask:Luminosity,R,G,BorSaturation.
This allows farther ability to pin point the area / tonal range to select. - Luminosity Mask Contrast (Focus / Roll Off Smoothness)
Control the smoothness of the generated mask. Higher contrast means sharper boundaries (In tonal range) between selected and not selected tonal zones. - Auto Tone
Automatically stretches the mask to capture full dynamic range of mask. - HTML Based UI
New UI for optimized and intuitive workflow build around Adobe Photoshop’s HTML Panel technology.
Unlike classic Plug In’s Fixel Zone Selector 2 can be used as a side panel with the image always available for peaking, zooming and panning.
The new UI also adds 7 presets to allow user have more efficient workflow. One of the presets (The middle) is user configurable.
This user guide presents Fixel Zone Selector 2 to the user with simple guidelines on how to use properly to achieve optimal results.
Installation
The installation is automated using the Windows and macOS installers.
Please follow the following steps:
- Verify Adobe Photoshop is not running.
- Unzip the
ZIPfile downloaded on purchase. - Run the installer inside the
ZIPfile:- Windows - Double Click
Fixel Zone Selector 2 - Windows Installer.exeinstaller and follow instruction.
The user may be asked for Administrator privileges in order to install the Plug In. - macOS - Double Click on
Fixel Zone Selector - macOS Installer.dmgdisk image and follow instructions.
The user may be asked for Administrator privileges in order to install the Plug In.
- Windows - Double Click
- Start Adobe Photoshop and launch the UI by going
Window -> Extensions -> Fixel Zone Selector 2(See below).
If any issue arises, please refer to Fixel Zone Selector 2 Installation Guide.
Fixel Zone Selector 2 UI
This section will show Fixel Zone Selector 2 User Interface (UI) and how to use it.
Launching Zone Selector 2 User Interface (Panel)
In order to launch the panel the user should:
- Open Photoshop.
- In Photoshop menu click on
Window -> Extensions -> Fixel Zone Selector 2.
Once done, the Zone Selector 2 UI will present itself:

The UI enable simple and intuitive operation of the edge enhancement process.
The panel allows the user to interact with the image while adjusting its parameters as it was any other native Panel of Photoshop.
Namely you can zoom in, zoom out, do panning, change opacity or visibility while interacting with the panel.
Main Window UI Components
This section elaborates on each UI Component.

As can be seen above, the Panel is composed of 4 main sections:
- Plug In Parameters
- 11 Zone Buttons.
Each button sets whether to include (Pushed down) or exclude the specific tonal range zone in the output mask. - Source Channel Buttons.
Sets the source channel for the generation of the Luminosity Mask.
For instance the user can choose theSaturationas source and push downZone 0andZone 1which means low saturation colors will be chosen. - Auto Tone.
When set toONthe plug in optimizes the Luminosity Mask to take advantage of the whole dynamic range. - Contrast Level.
Controls the roll off of the Luminosity Mask. Higher value means more focused mask with sharper transitions between selected zones to excluded zones in the tonal range.
- 11 Zone Buttons.
- User Adjustable Presets.
6 presets to cover 99% of the use cases for Luminosity Mask. The middle button is user configurable. Setting it by a long click (Click & Hold) which freezes the current settings into a preset. - Panel State Elements - Composite, Mask and Reset.
TheCompositemode displays the current output of the masking procedure. TheMaskmode displays the Luminosity Mask. TheResetbutton resets, on click, the state of the panel to its default. - Home Page, Settings, User Guide and About Screen Link Buttons.
Home Page opens a browser with the Fixel Website, Settings opens the Settings Window (See below) of the Plug In, User Guide open a web browser with this address and the About icon opens a window with the version string of the Plug In.
The main feature of the Plug In is being able to include or exclude tonal ranges (Zones) form the output.
While most Luminosity Masks Actions / Panels just automates Photoshop procedure Fixel Zone Selector 2’s algorithm is implemented by a proprietary Plug In. It is not constrained by the limitations of Photoshop’s tools as described in Luminosity Mask - How Does It (Really) Work? and Luminosity Mask Done Right! posts.
Hence the user, at most time, will easily achieve the results with the highest quality in the industry.
Settings Window Parameters
Currently there are no user controlled settings.
Using Fixel Zone Selector 2
This section describe how to use Fixel Zone Selector 2.
Workflow
Fixel Zone Selector 2 is designed to give the user effortless ability to generate the Luminosity Masks with pinpoint accuracy.
The recommended usage of Plug In is as following:
- Start a new session by launching the Panel.
Make sure the active layer is the layer to be used as reference for the mask generation.
The Plug In will add a Mask Channel automatically. - Interact and adjust its parameters to taste.
- Toggle between
Composite/Maskmodes to evaluate result. - Tweak parameters to adjust output to taste.
When done with the Plug In, continue working on Photoshop.
You may return to the layer of interest to tweak result as needed.
Effect of Parameters
Fixel Zone Selector 2 has few parameters to adjust with the main ones being the selection of zones.
This section will focus on the different values of the main parameter of Fixel Zone Selector 2.
Fixel Zone Selector 2 can target generate different mask targeting different tonal ranges quite easily.

In the above figure one could see 7 images: The big one as the input and 6 small ones represent the 6 presets ordered as in the top left corner. As can be seen, the presets indeed generate the expected mask according to the applied preset. The masks are very smooth yet selective.


The above image carousel shows the effect of the parameter Contrast. The parameter can be used to change how harsh the transition between included tonal range to those which are excluded.
The higher the contrast the sharper the transition. Intuitive way to think about it is how focused one wants the mask to be.
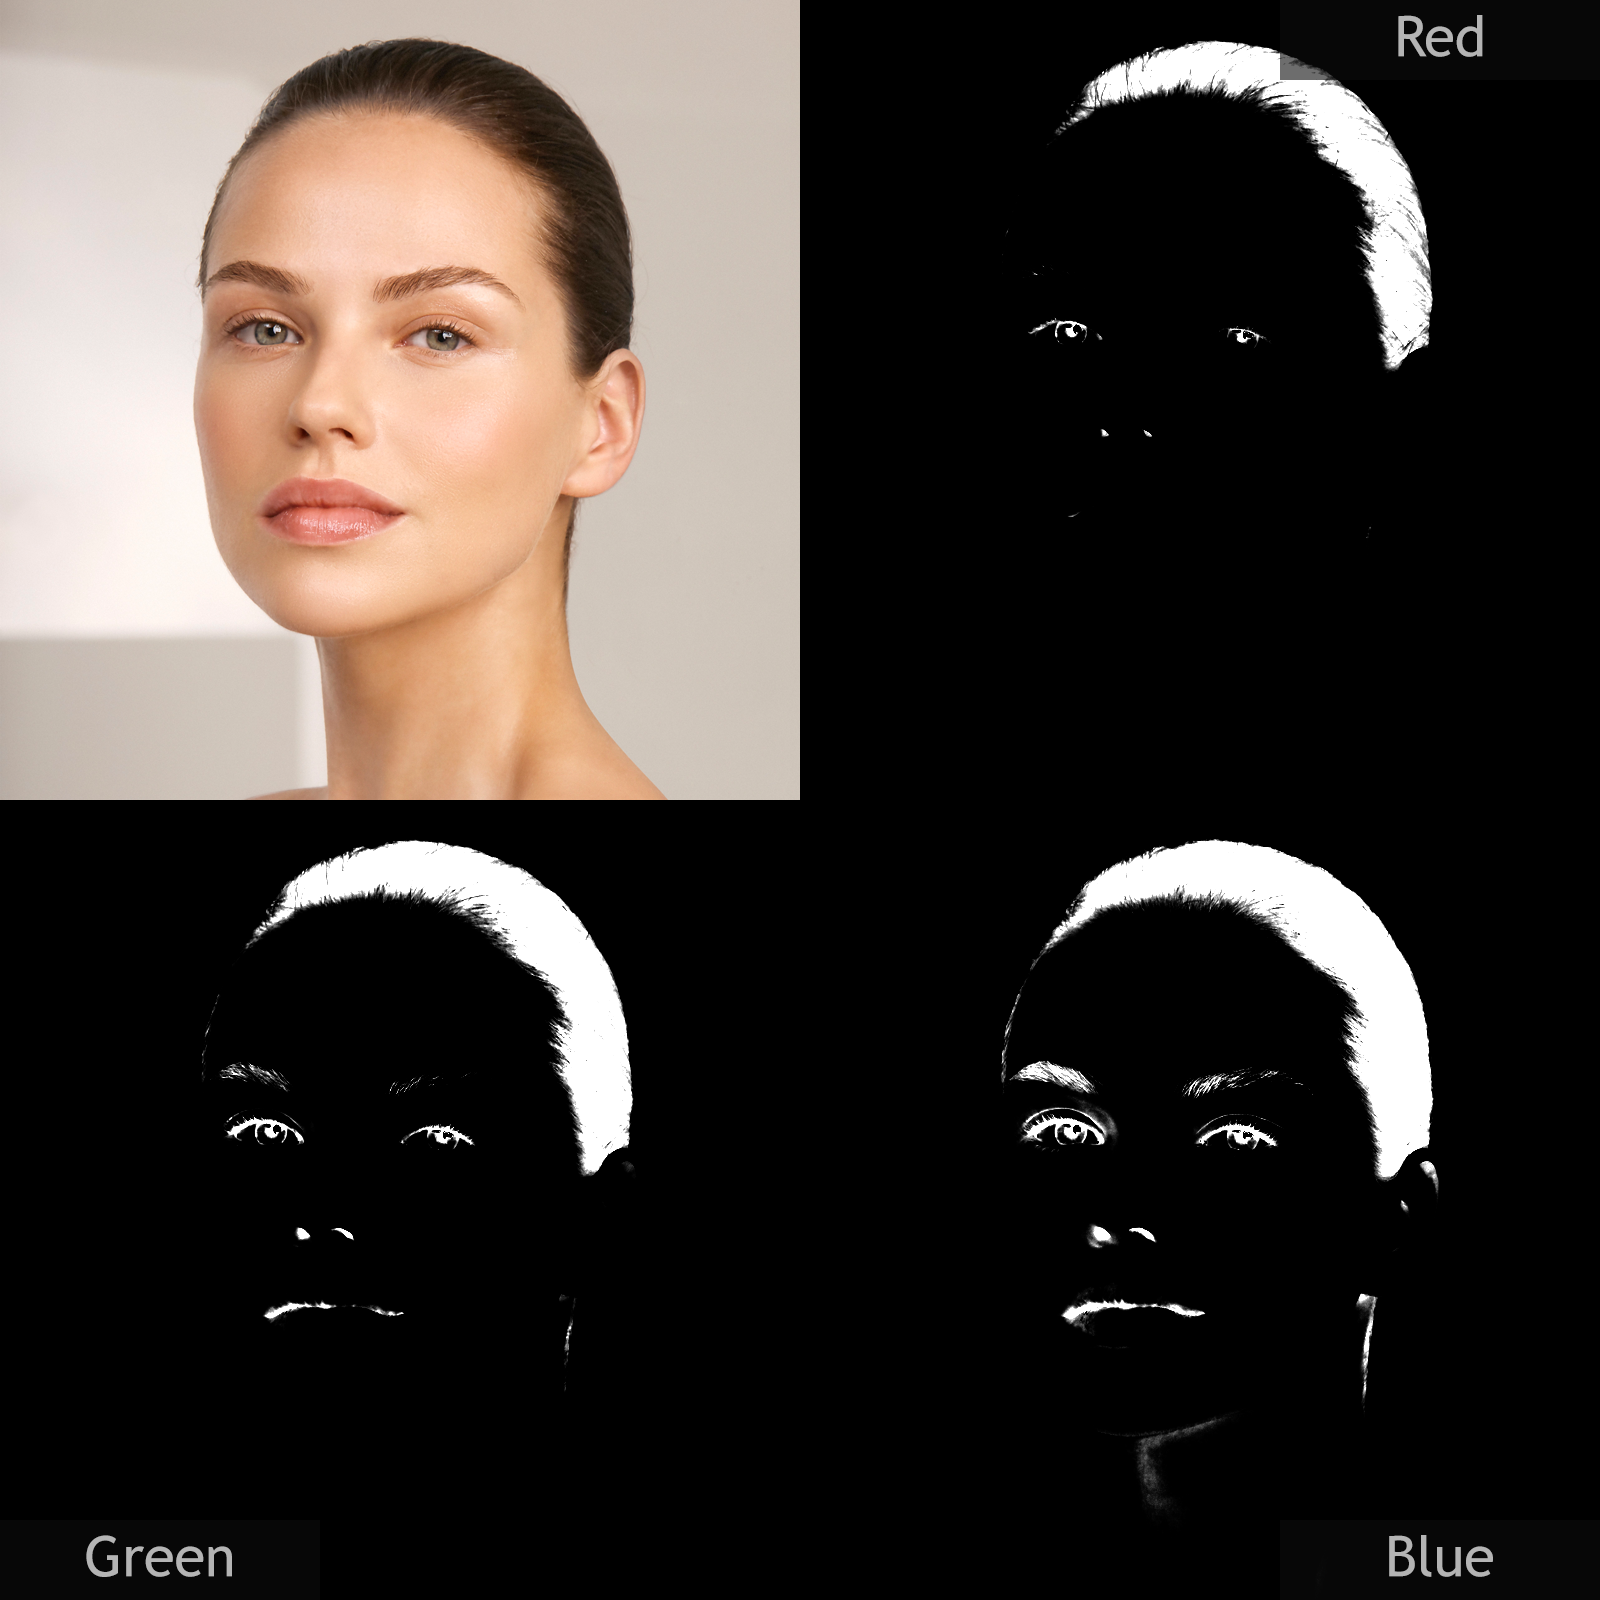

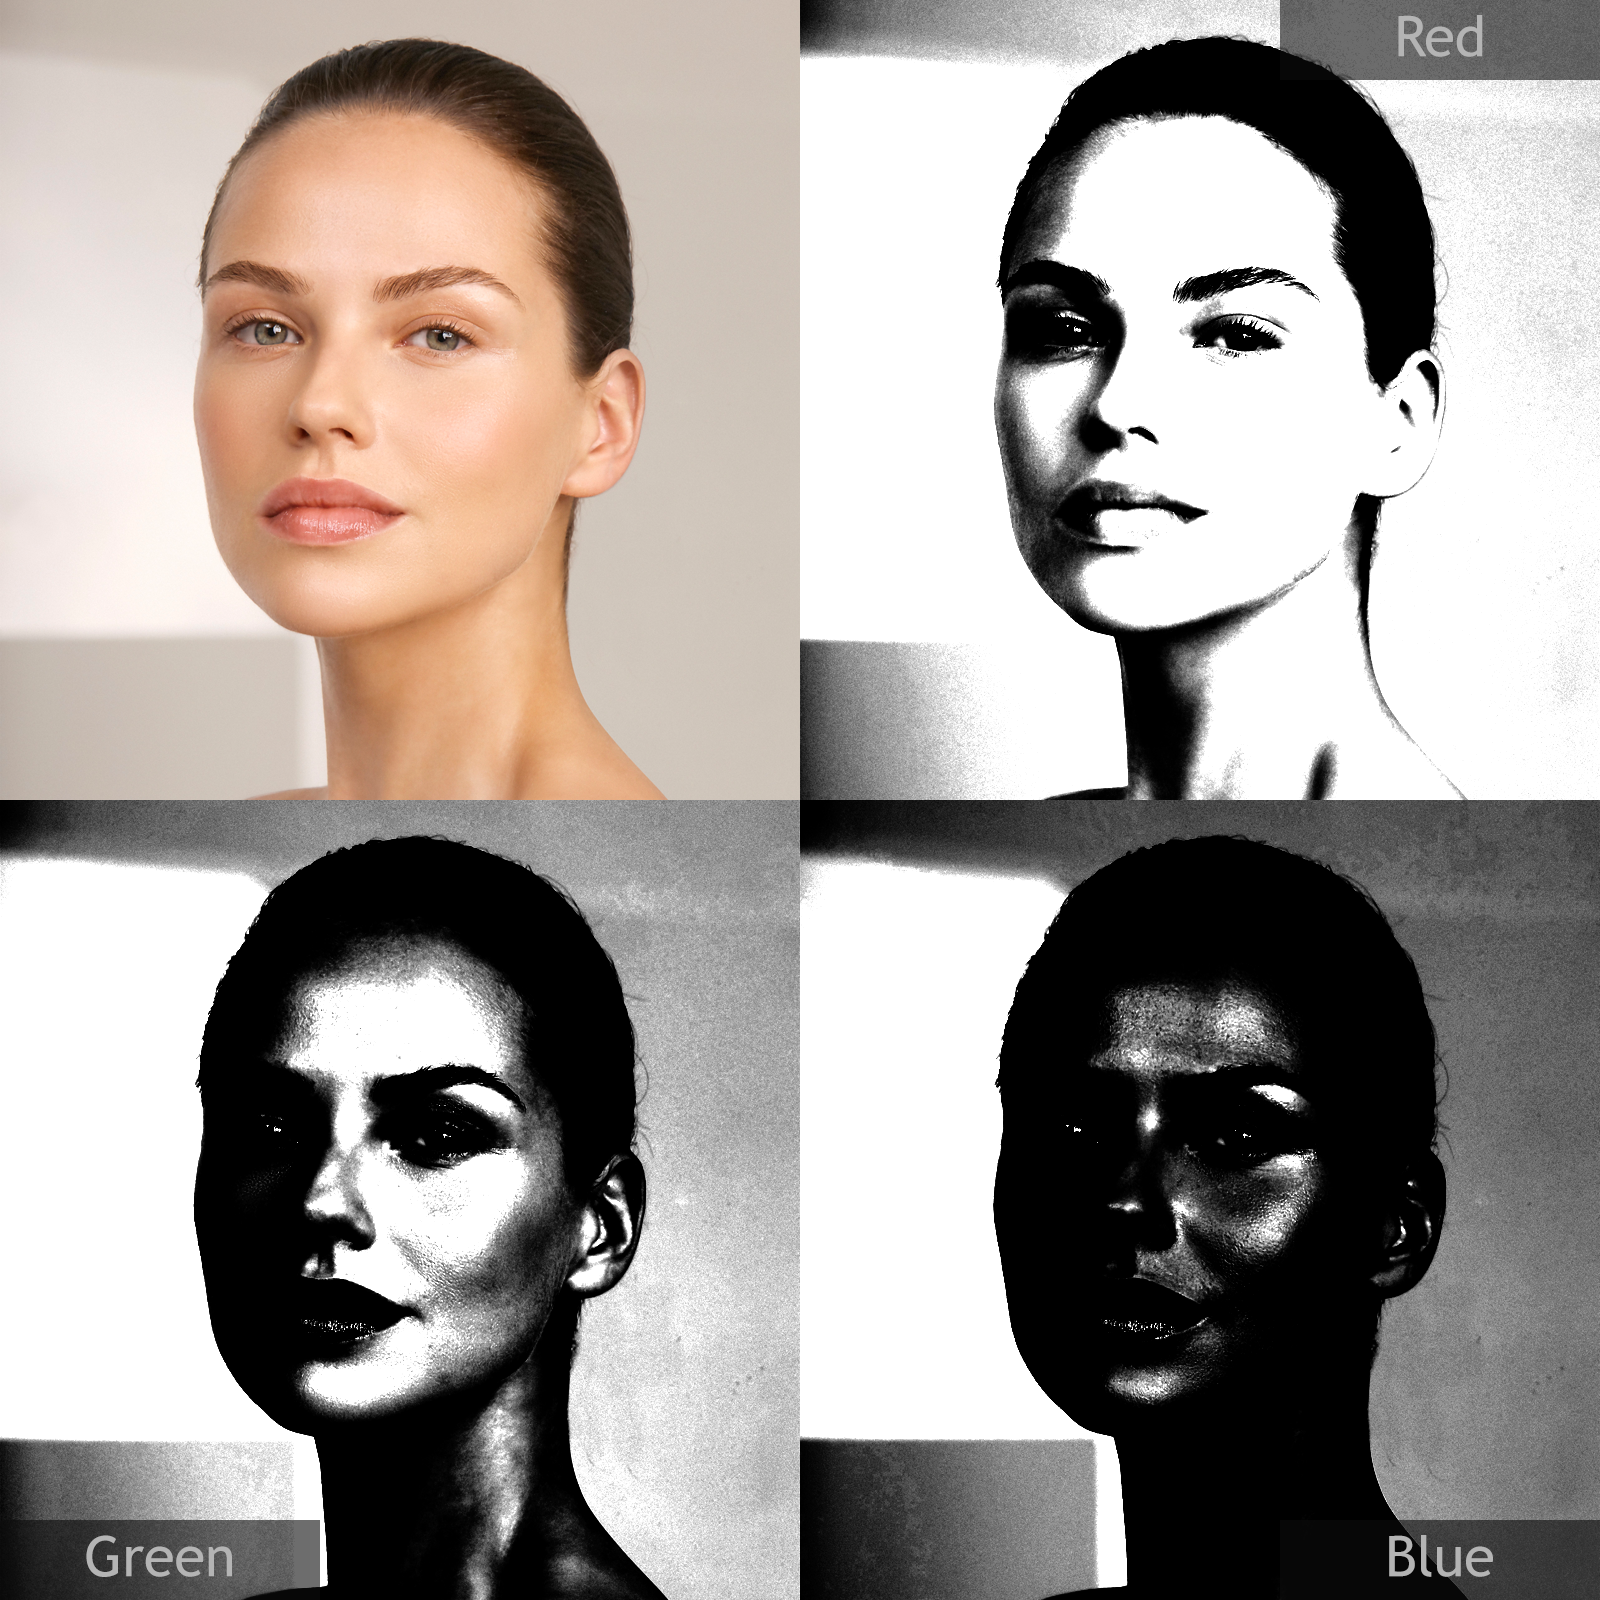
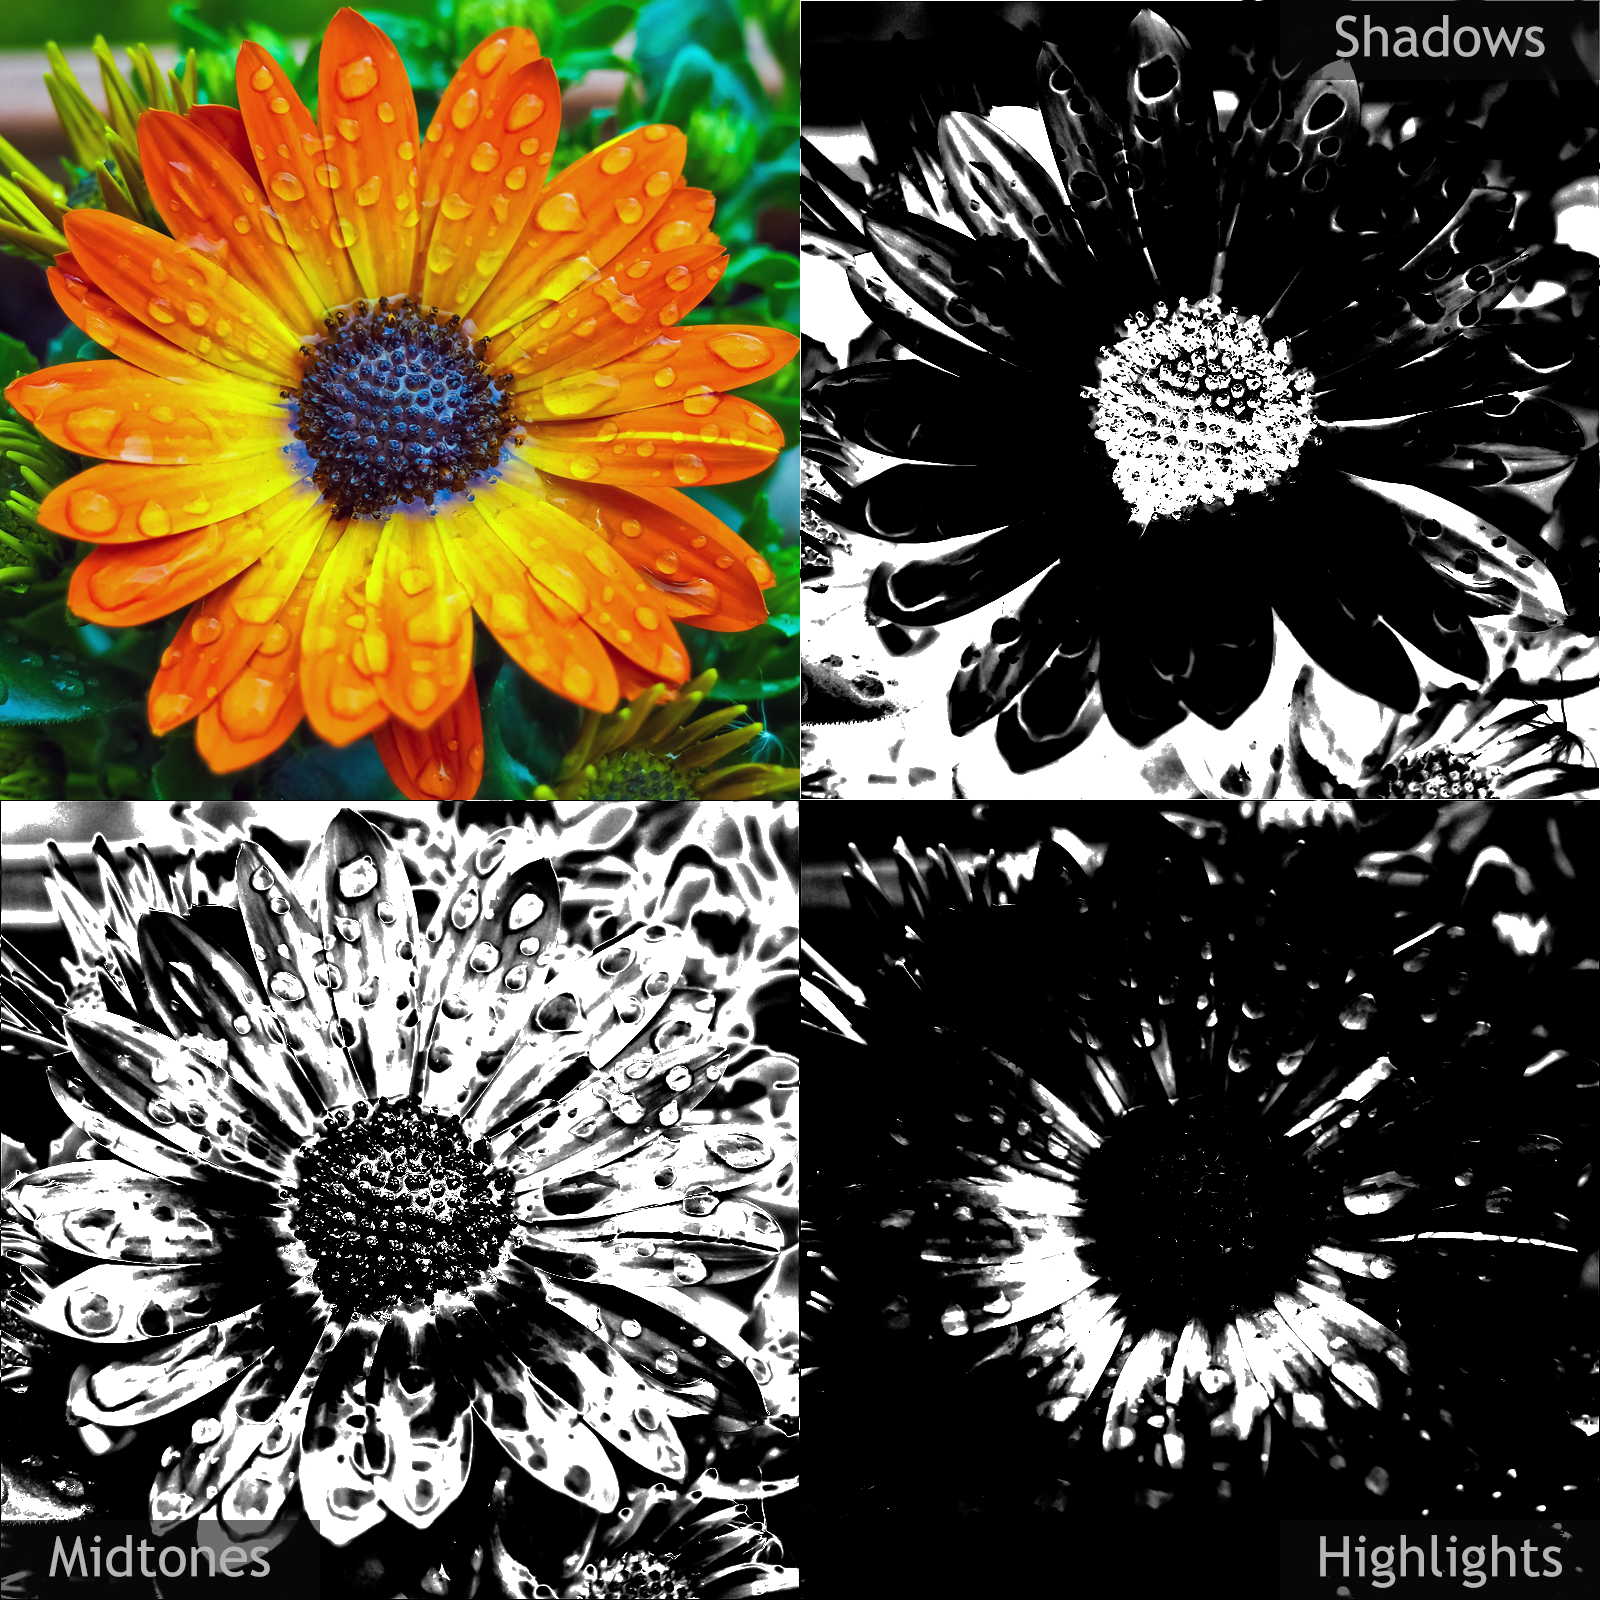
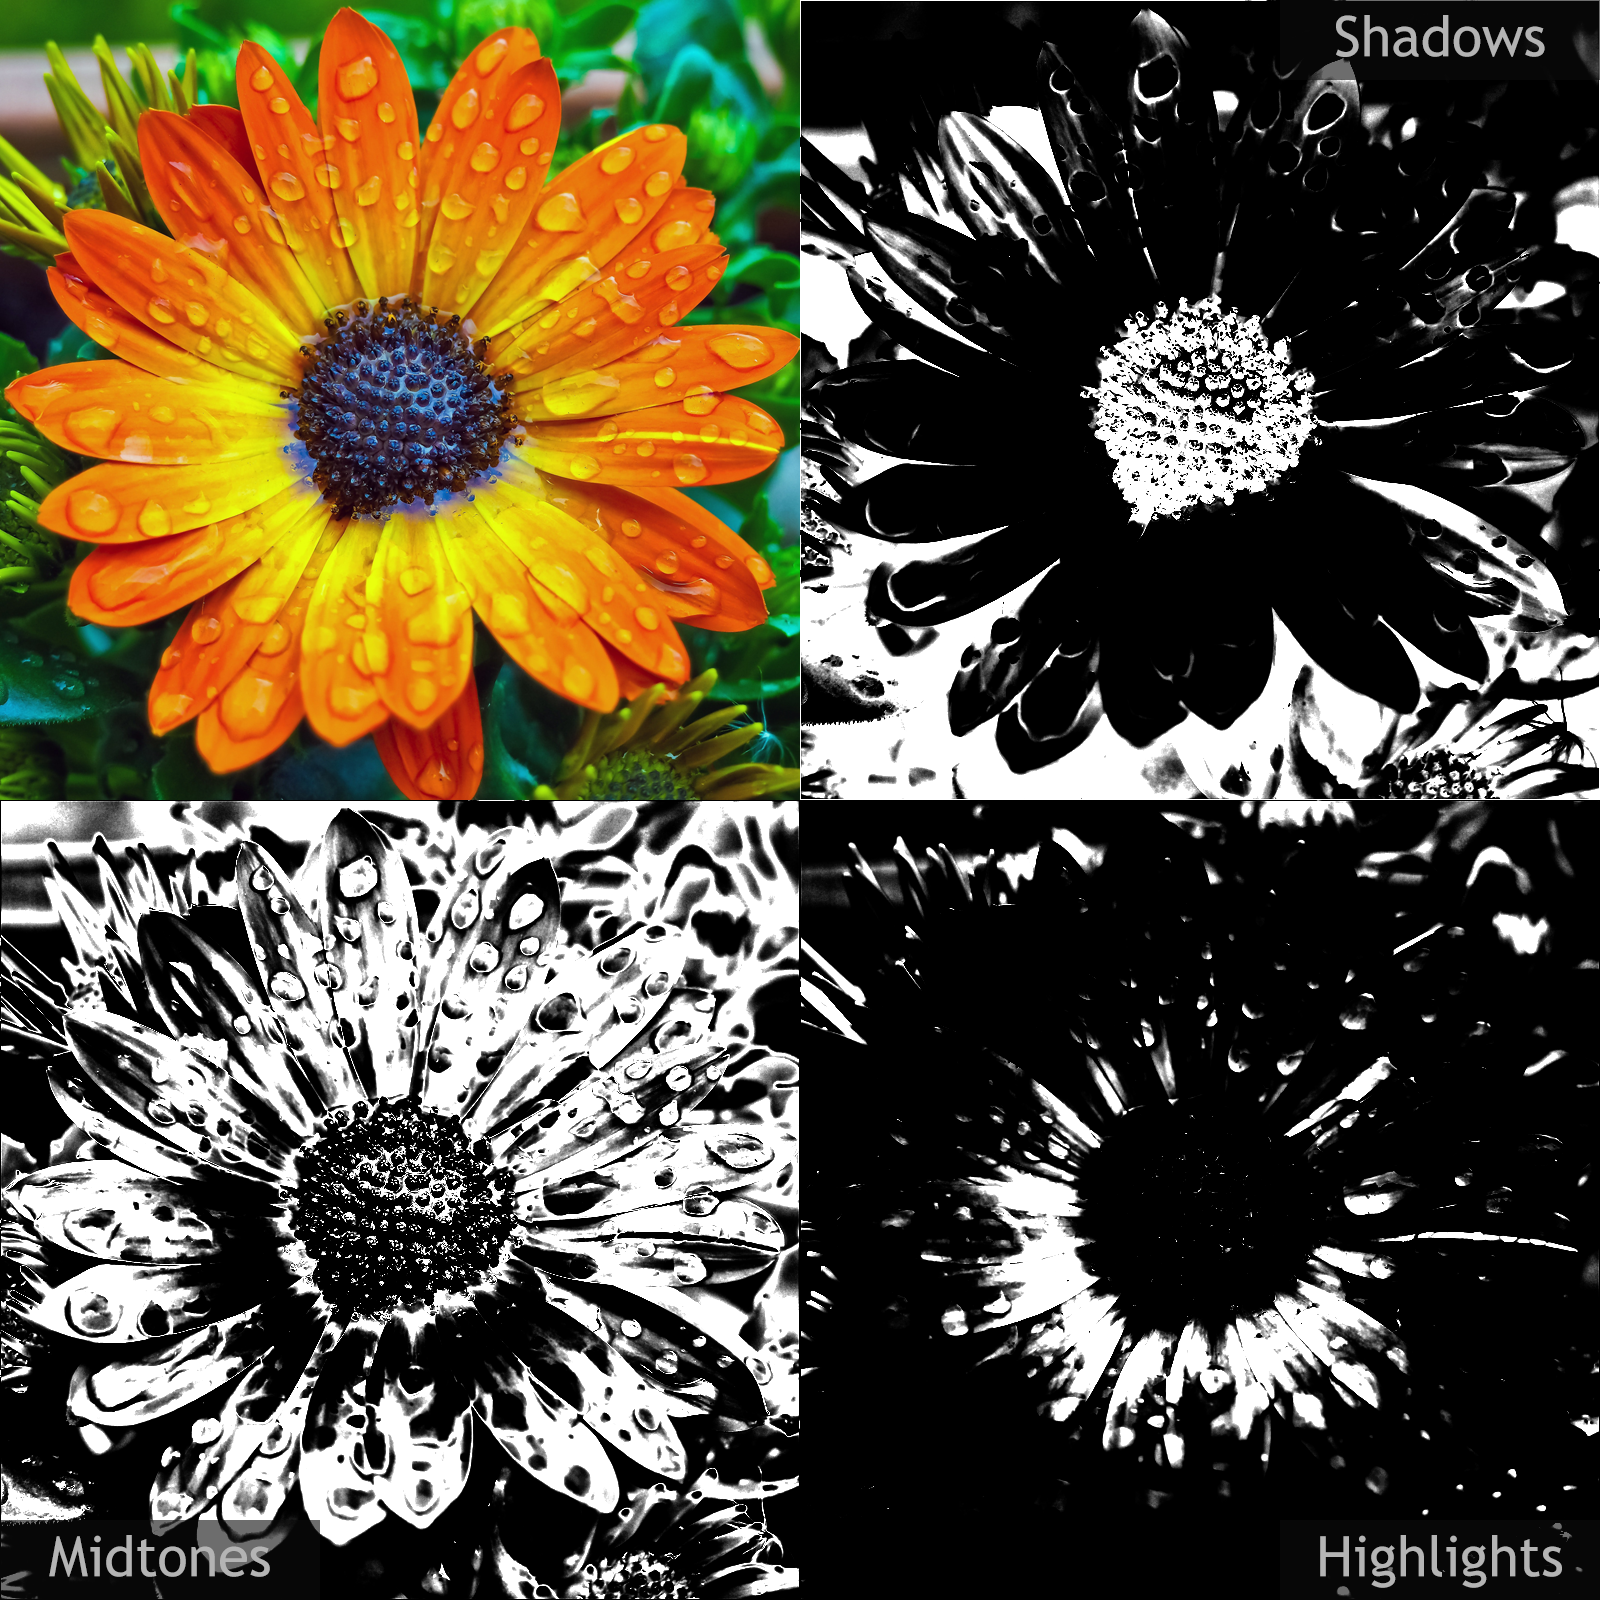
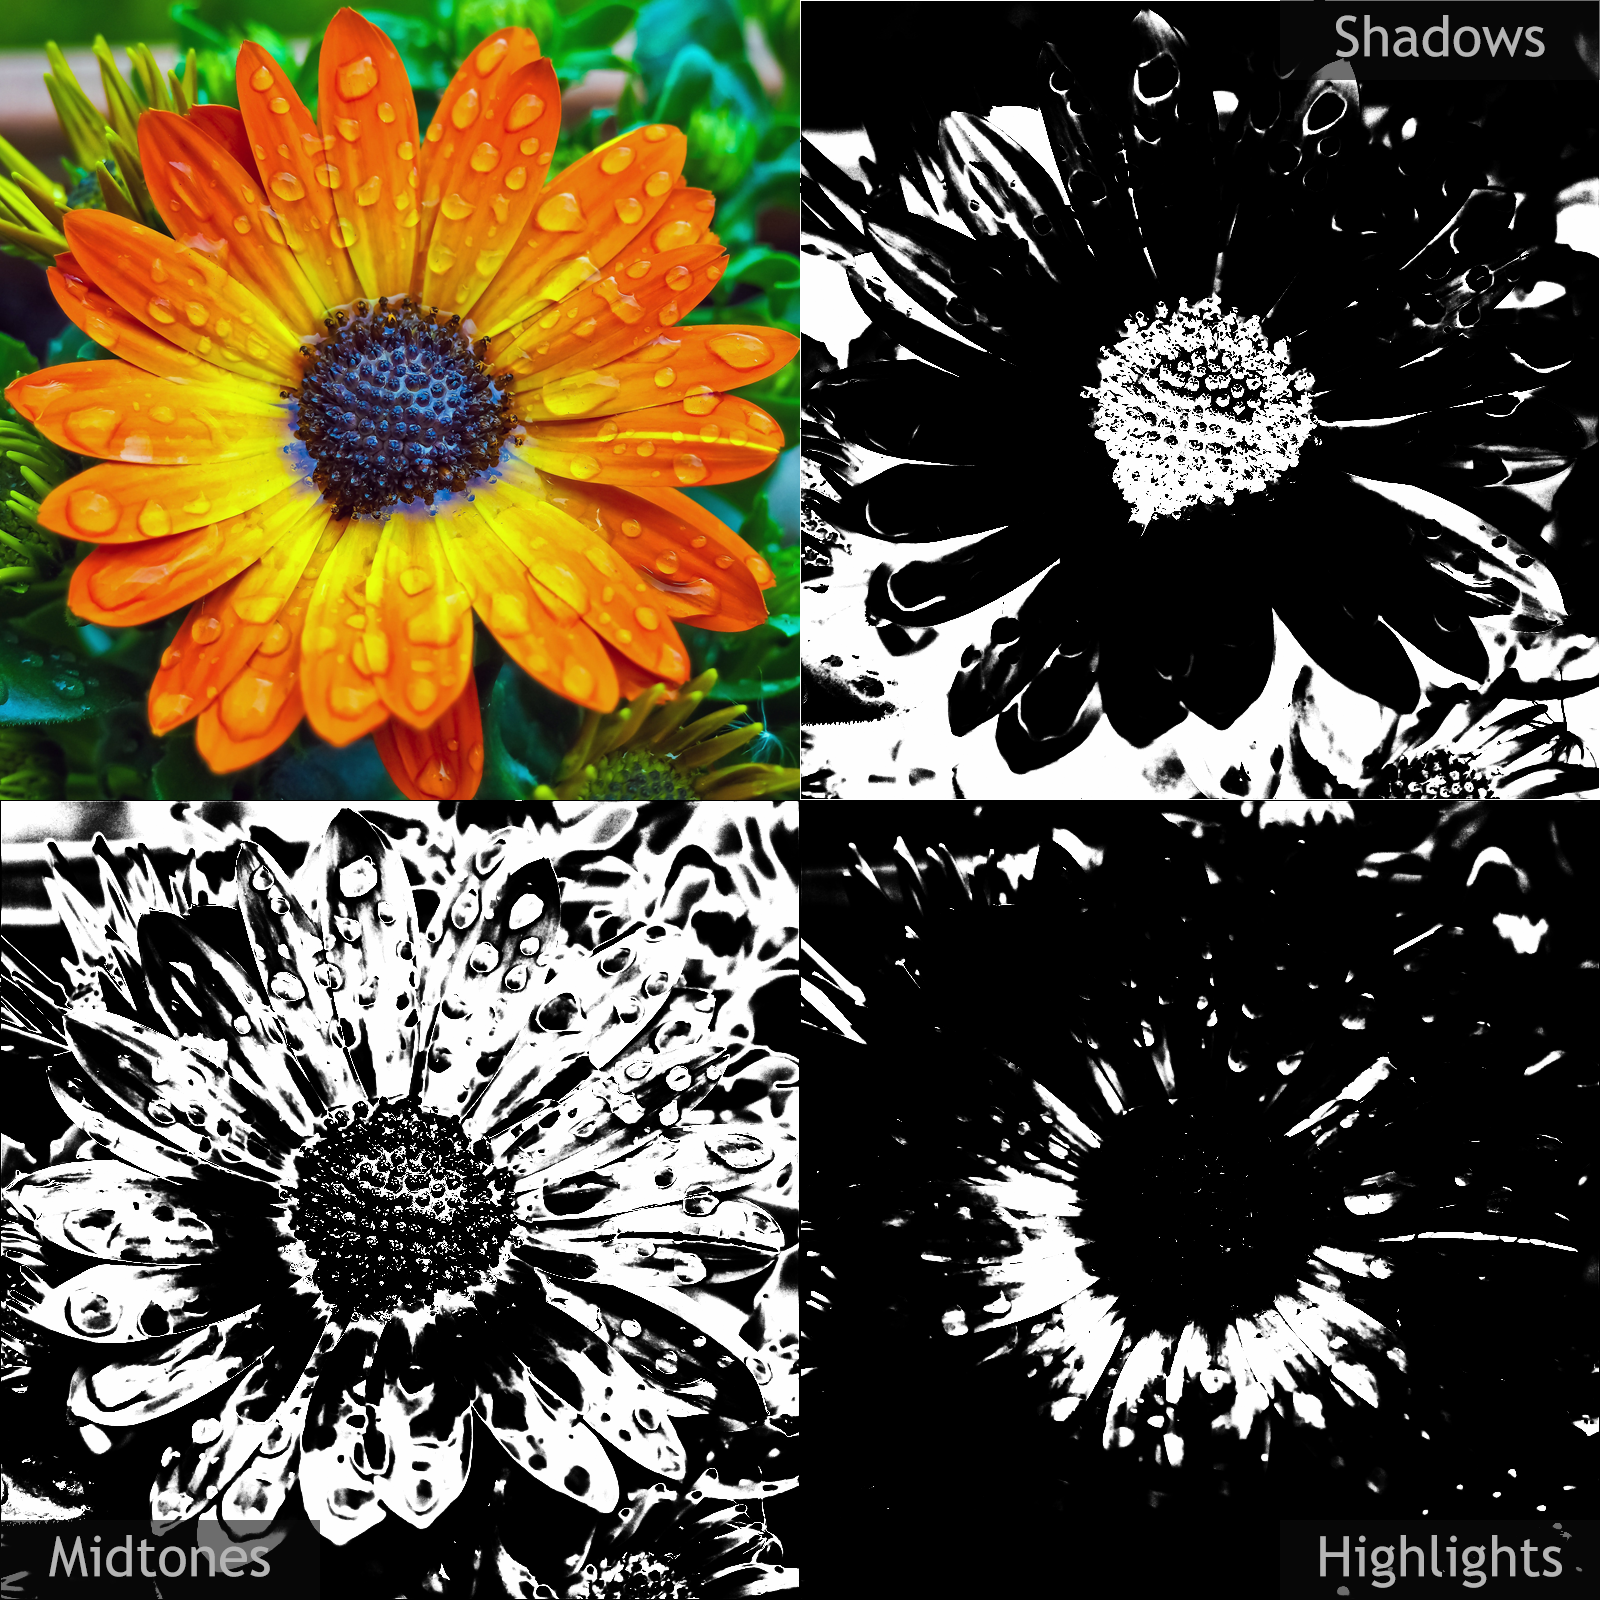
The above image carousel shows the effect of the parameter Source Channel. In each image one could see the different channels of RGB for different tonal ranges - Shadows, Midtones and Highlights.
In many cases working on different channels can generate the perfect selection as we add color information to the tonal range.
As one could see, in some cases the tool can even generate interesting grayscale look (High Key).
Tips & Tricks
There are some simple guidelines to keep in order to maximize the effectiveness when using Fixel Zone Selector 2:
- Start with the given presets and add or remove specific zones as needed.
- Explore different channels as sometimes the information is in the color and not only in the Luminosity.
- Use the
Contrastparameter as the final step to tweak the output mask.
Showcase
This section shows few images with different parameters applied on them.

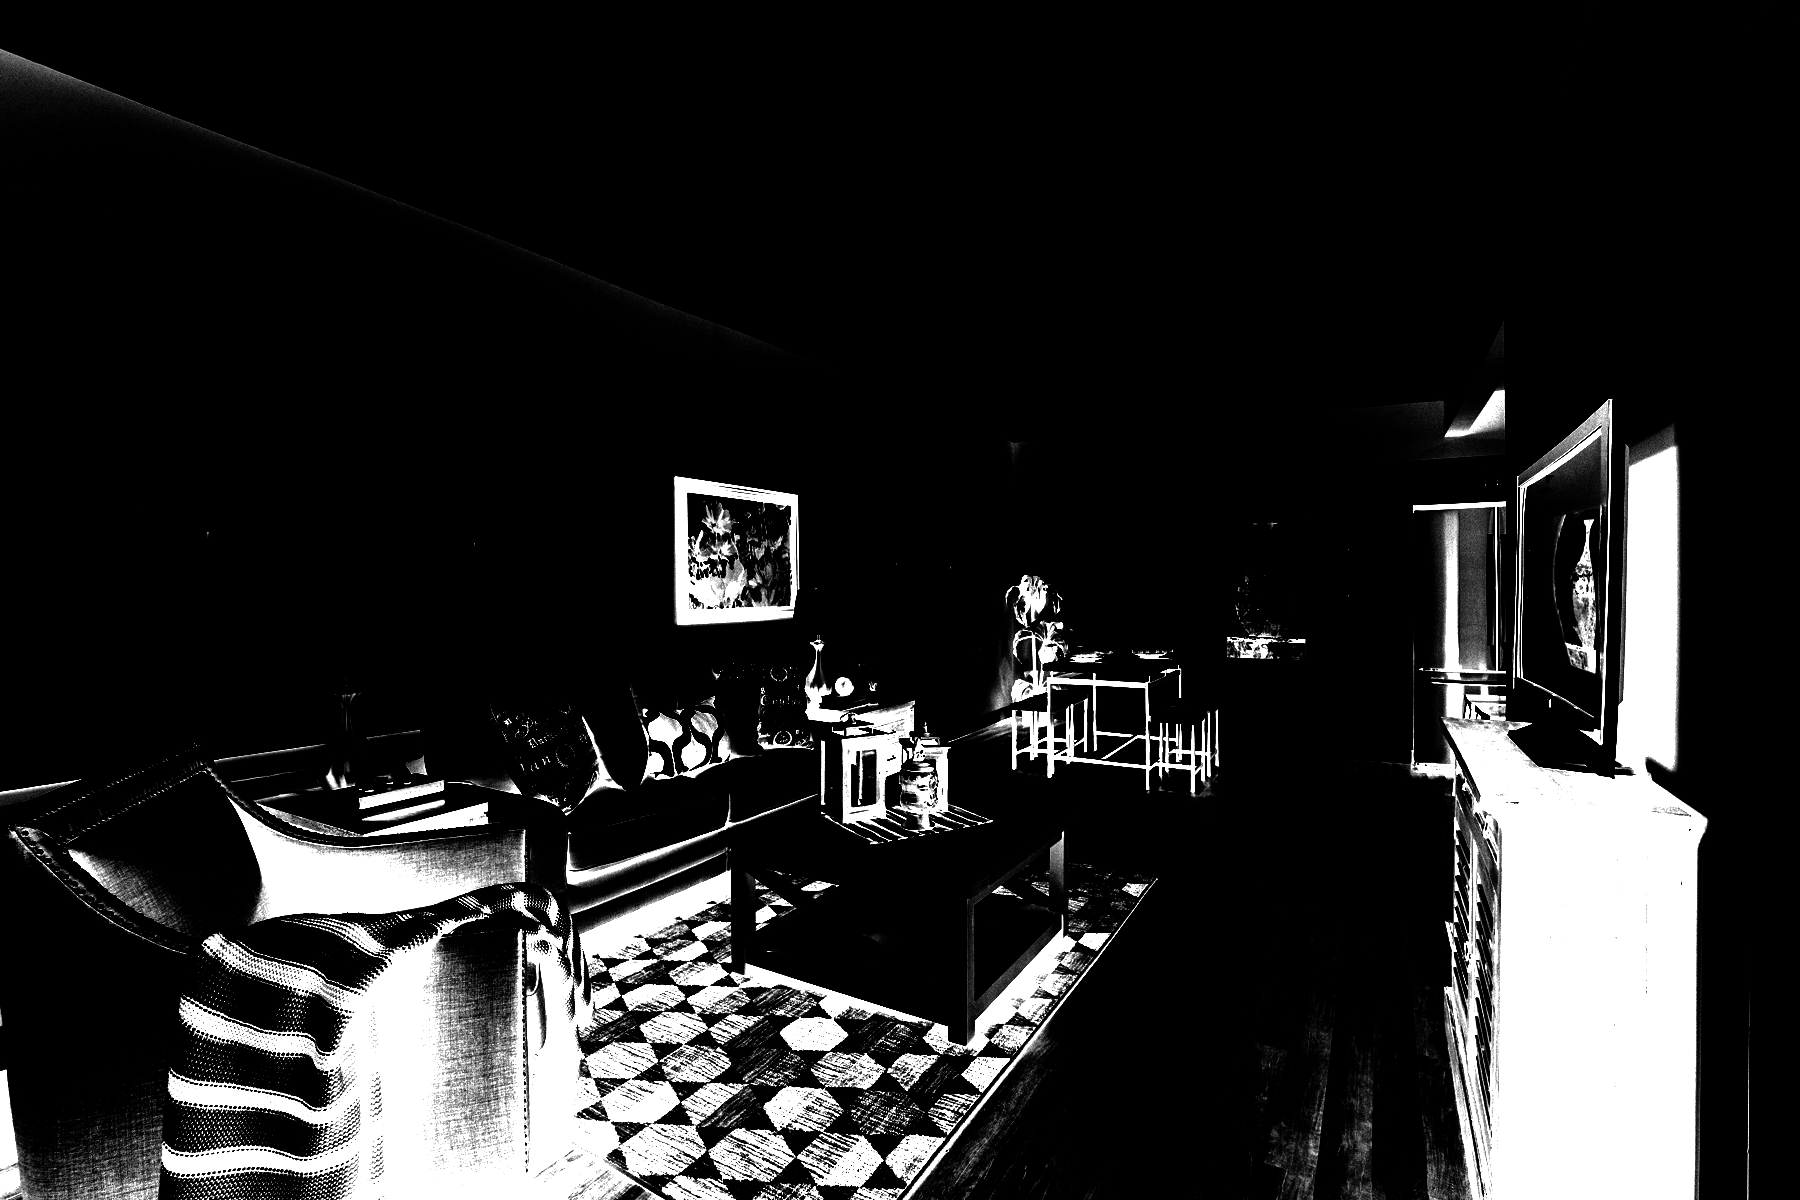
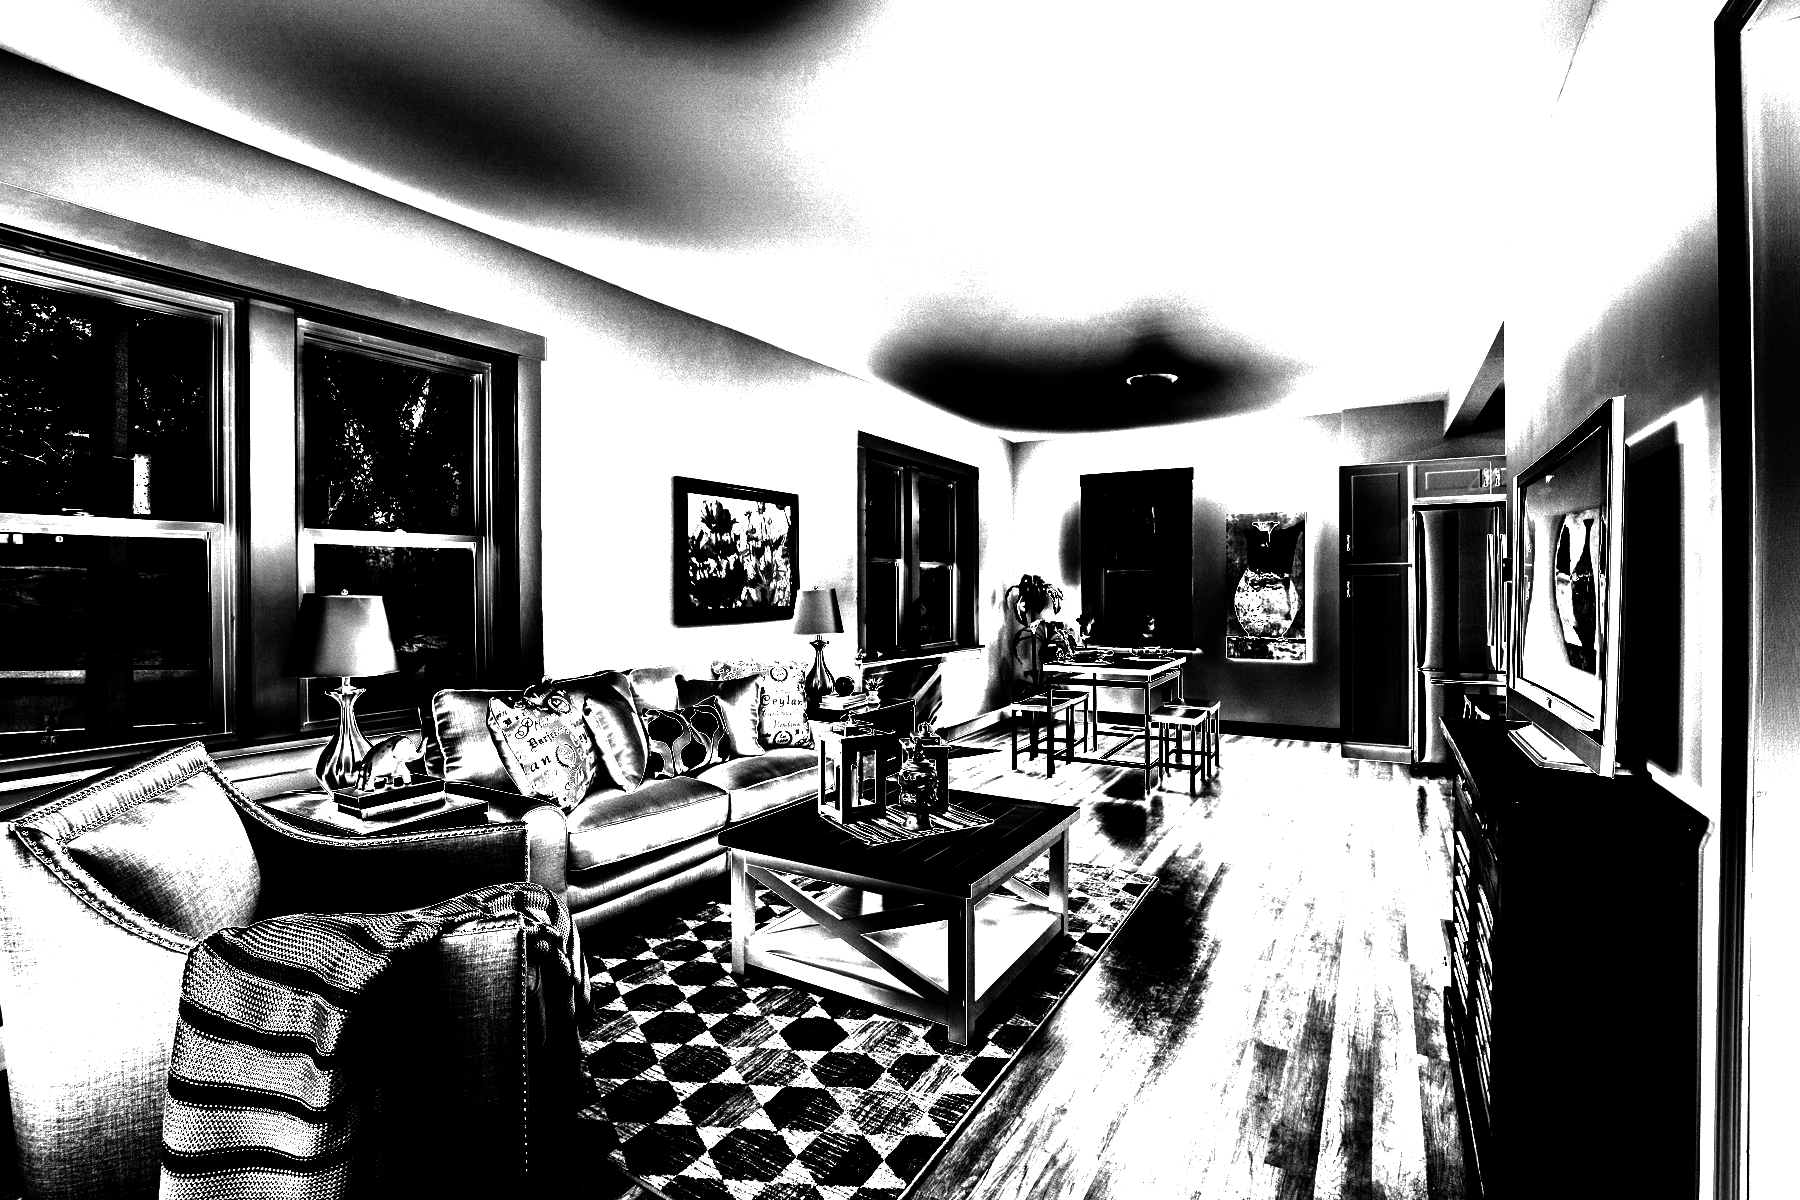
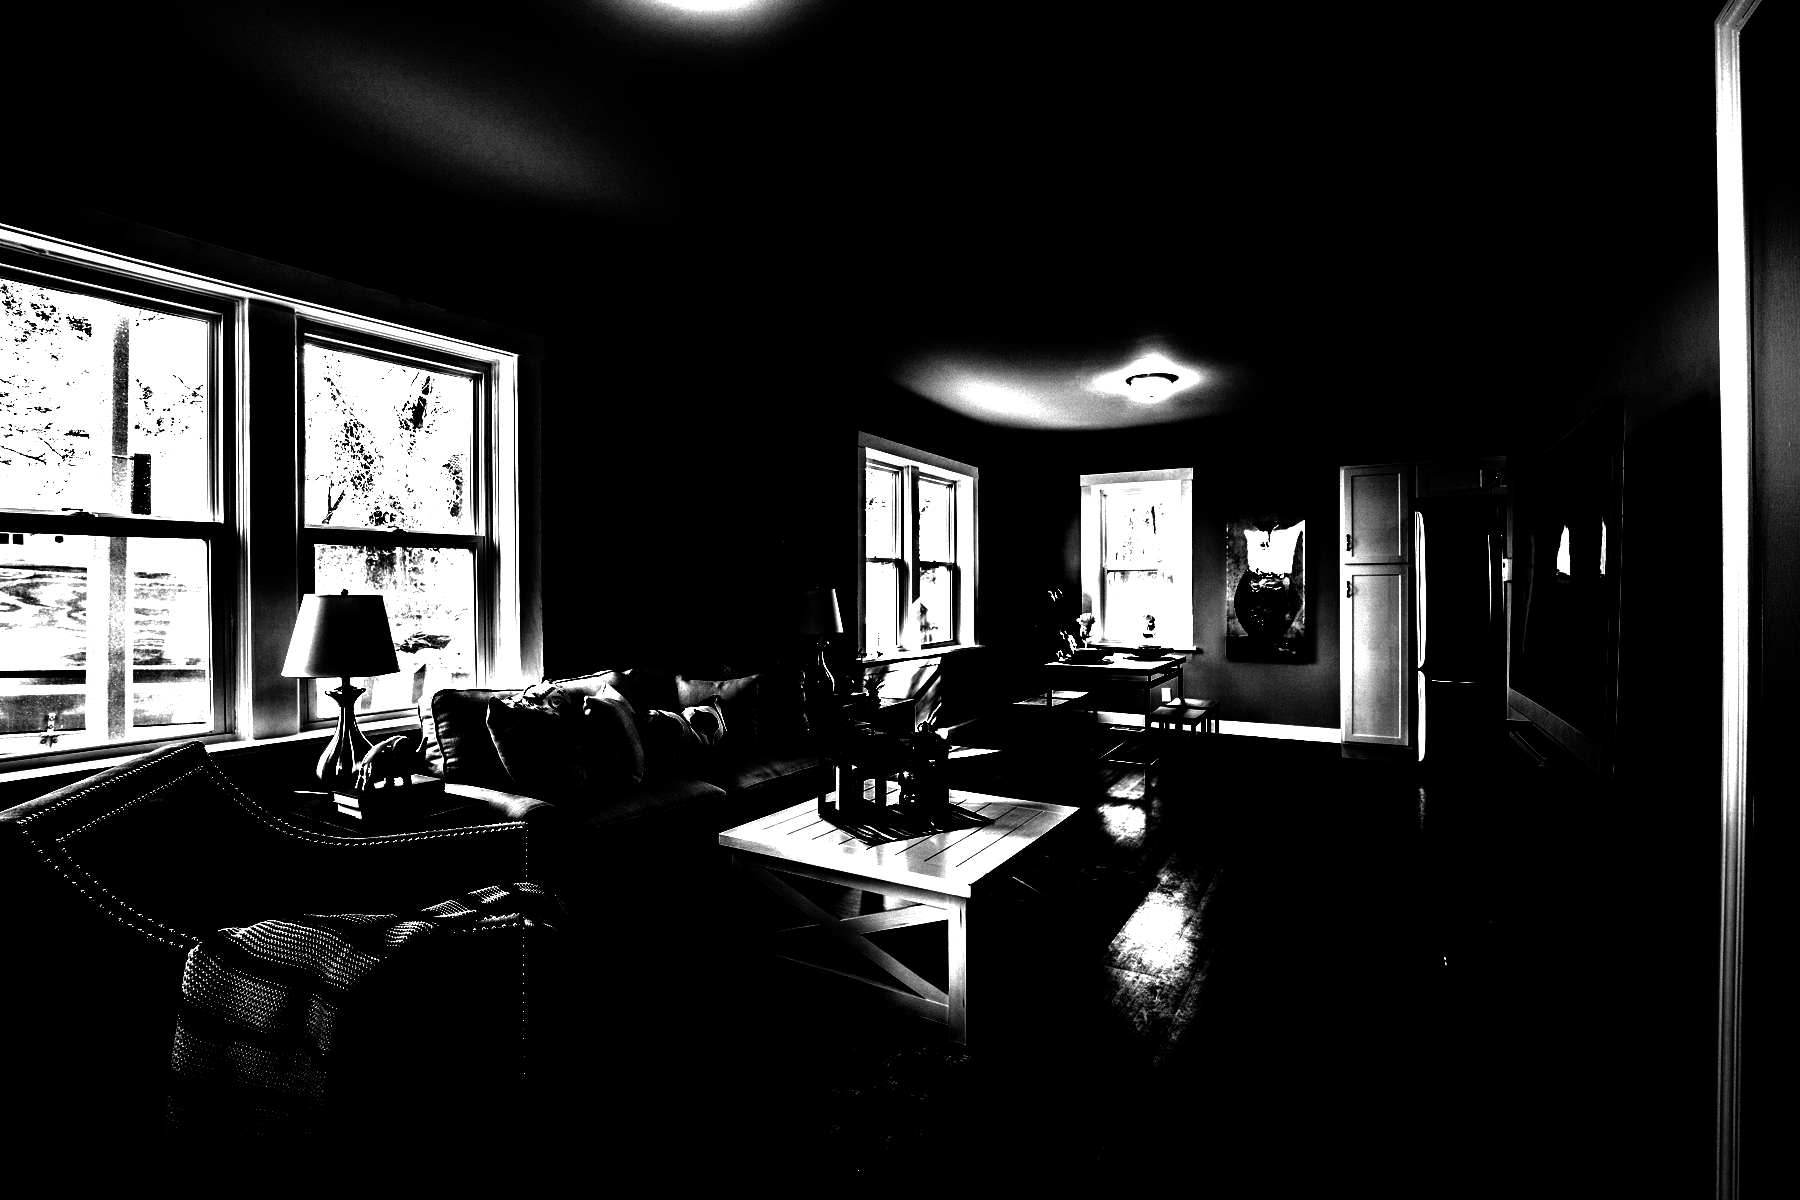
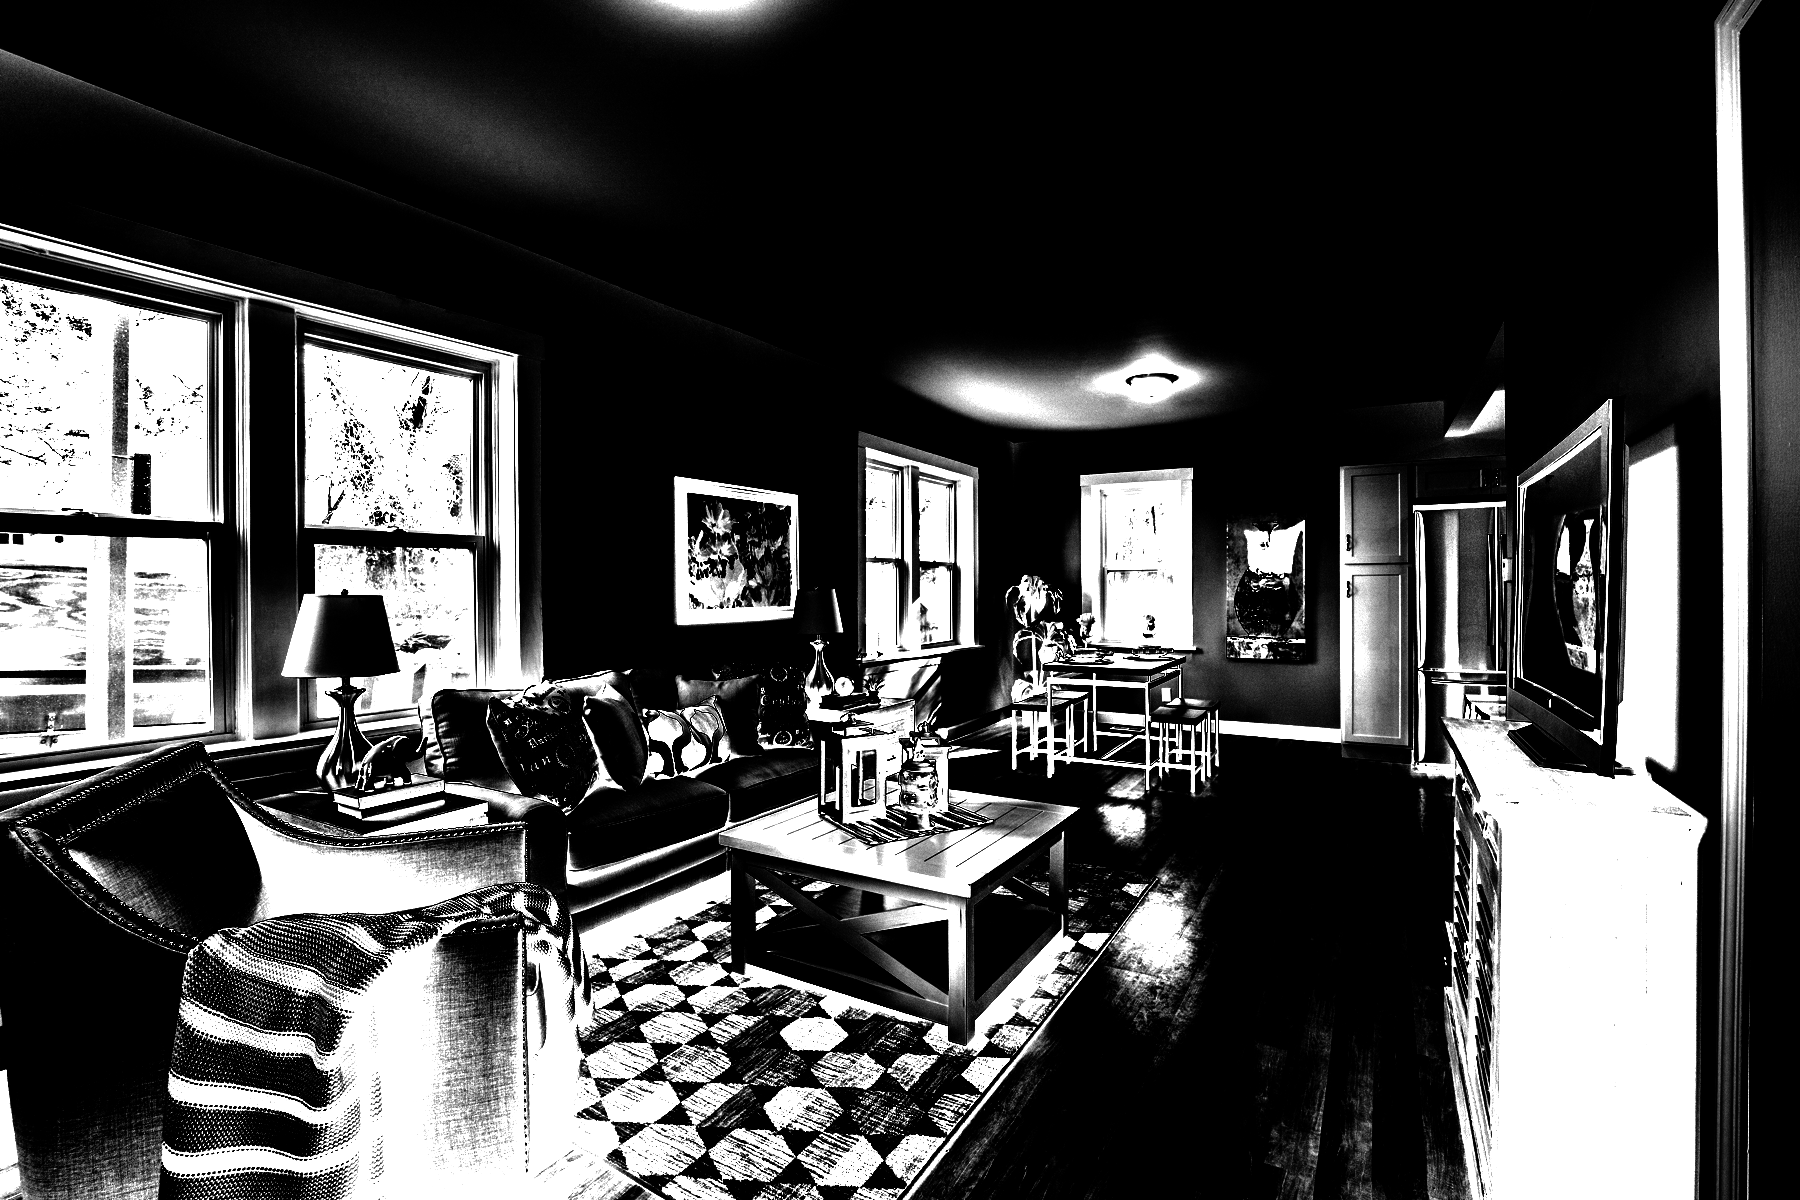
In the above show case (Click on Left / Right to scroll the images) one could see the results of each 6 presets.
The image is fairly complicated with high dynamic range to show the quality and accuracy of Fixel Zone Selector 2.
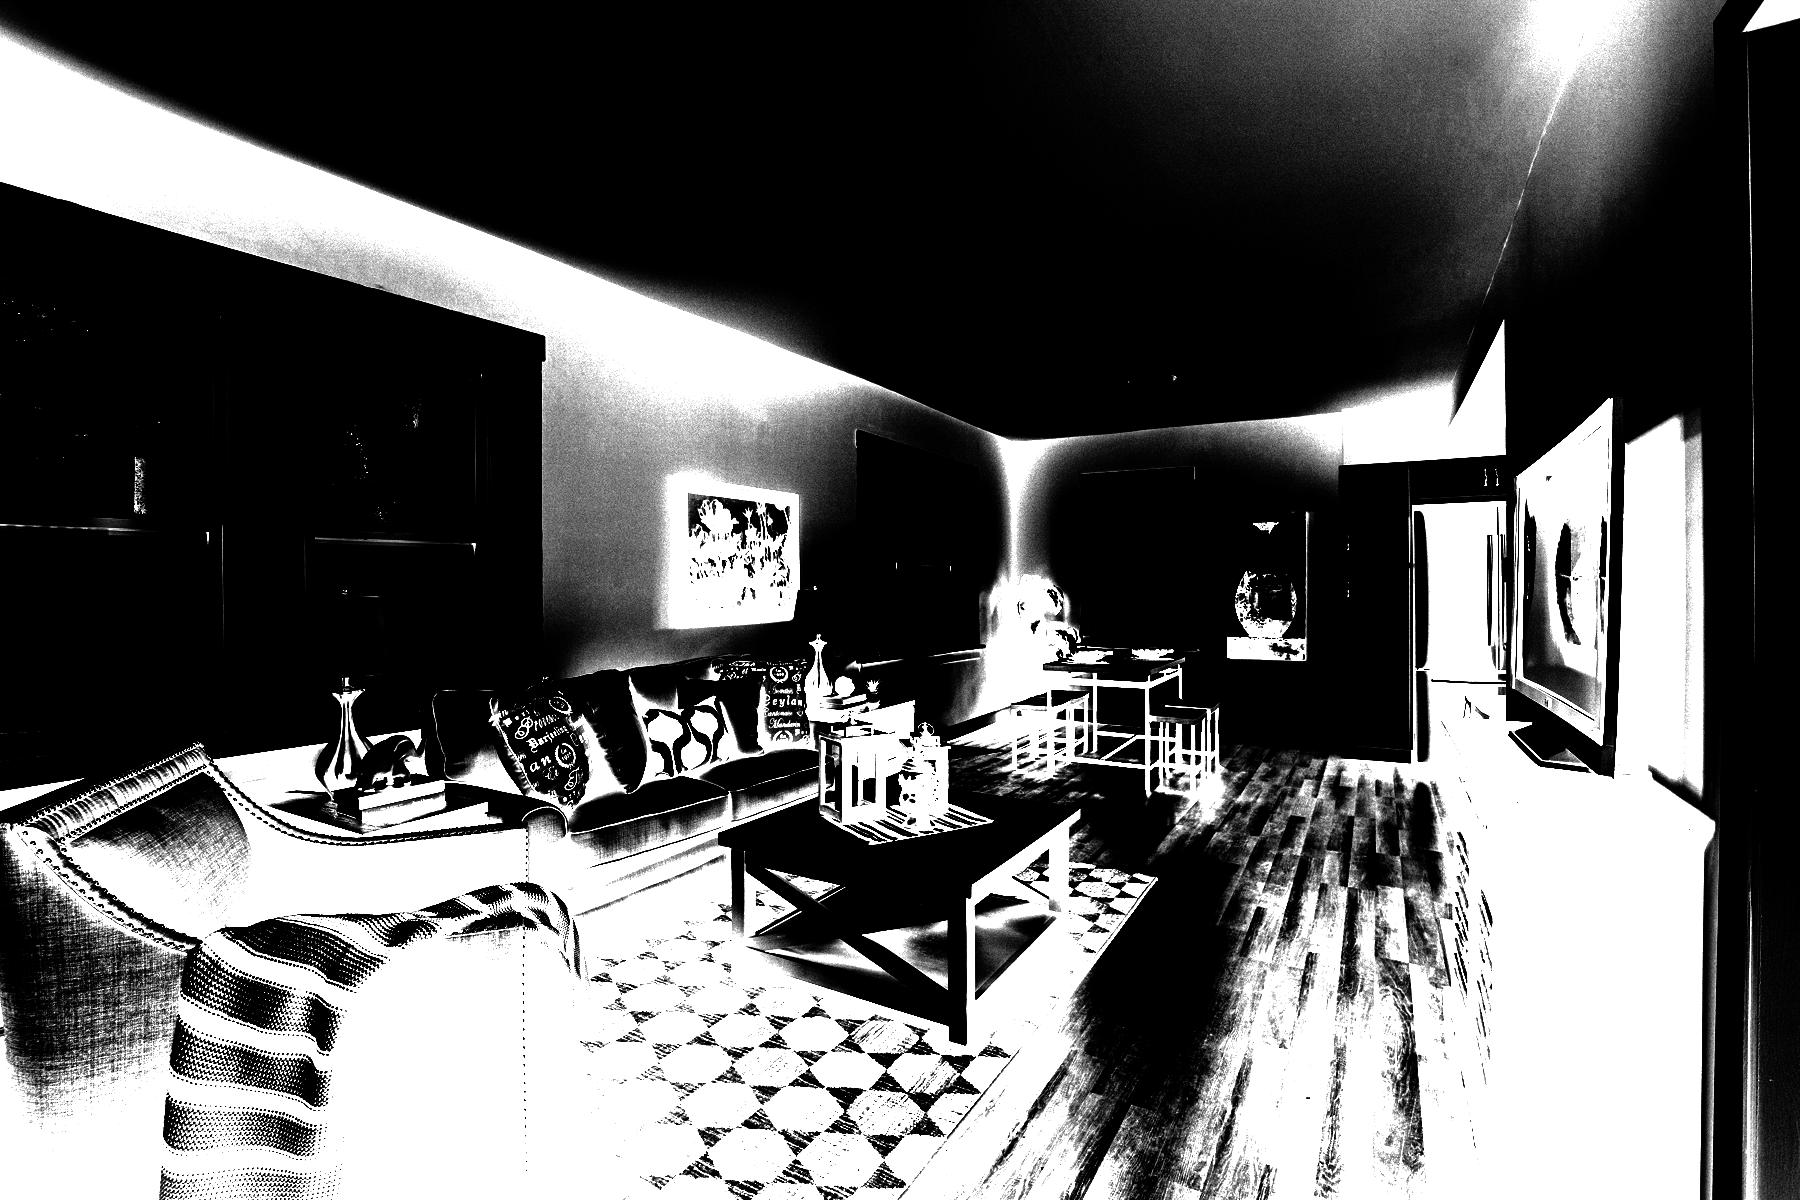
Preset - Highlights & Midtones, Channel = R, Contrast = 0, Auto Tone = ON
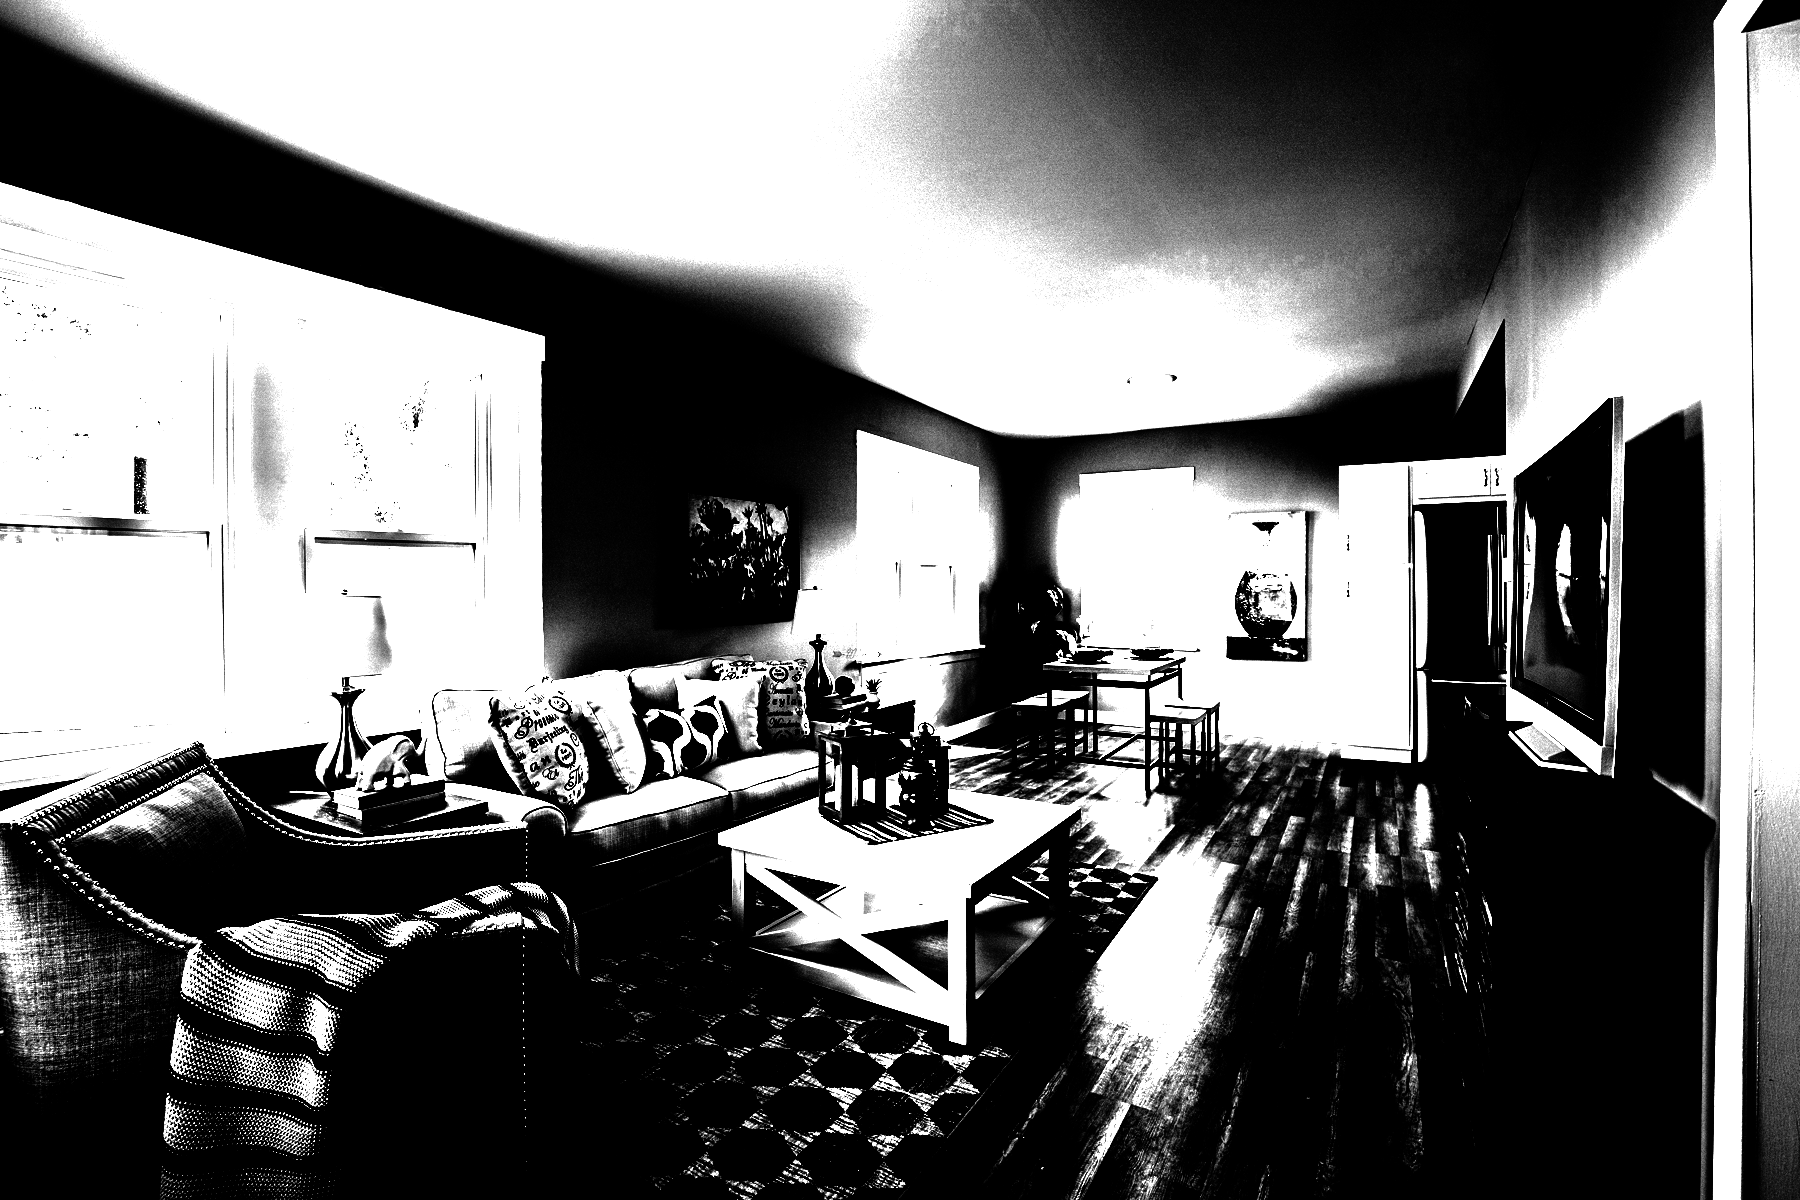
Preset - Shadows, Channel = B, Contrast = 25, Auto Tone = ONSummary
Fixel Zone Selector 2 is a different kind of a Luminosity Mask generator. It prioritizes the accuracy and quality of the mask with the simplest user experience in order to be effective. The idea is a tool that does one thing but does it very well.
Fixel Zone Selector 2 utilizes state of the art algorithm which is proprietary to Fixel Algorithms which was improved in version 2 of the Plug In. Fixel Zone Selector 2 also improves the UI and give the user more choices: Presets, Source Channel and Contrast in a modern HTML5 based UI.
We listened to the feedback of many of Fixel Zone Selector 2 users and used it to create this step forward.
We hope you’ll find it useful as well and hope to hear your feedback to get even better with the upcoming iterations.
Resources
- Fixel Zone Selector 2 Product Page.
- Fixel Zone Selector 2 Installation Guide.
- Fixel Zone Selector 1 Product Page.
Key Words: Fixel Algorithms, Fixel, Fixel Zone Selector, Image Enhancement, Luminosity Mask, Saturation Mask, Tonal Range Selection, Photoshop, Plug In, Photoshop Plug In.