Fixel PixelGear 2 - User Guide 13 April 2019
![]()
Fixel PixelGear 2 Photoshop Plug In - User Guide
Background
Fixel collaborate with other teams in order to create the perfect products. Fixel main contribution is its unique algorithms.
Sometimes such collaboration comes to an end and a decision must be made about the joint product.
This is the case of Fixel PixelGear 2 which used to be called PSKiss PixelGear 2.
Since many users use this product daily, instead of archiving we decided to bring it back home.
We intend to continue develop it and make it better each generation.
Yet before that, we just picked it as it was (Wonderful!), fixed few bugs, optimized performance and renamed is - Fixel PixelGear 2.
Fixel PixelGear 2 is all about Keep It Simple and Smart. It integrates a simple and intuitive workflow yet utilizes advanced algorithms.
This post is a redo of PSKiss PixelGear 2 Quick Start Guide.
Introduction
Fixel PixelGear 2 is composed of 3 filters:
- SkinGear – A professional skin retouch filter.
- ToneGear – A professional Shadows, Highlights and Global contrast enhancement filter.
- EdgeGear – A professional edge enhancer.
All filters based on original algorithms, specially designed for this panel.
In this tutorial we will use a portrait photo in order to emphasize SkinGear’s advantage in skin retouch. You can use PixelGear 2 on any kind of photos.
After installing PixelGear 2 (See Fixel PixelGear 2 Installation Guide) panel and filters and presenting the panel, open a photo you wish to edit.
In this tutorial we’ll be using the following photo (By Yair Tsriker) as reference:
![]()
Launching PixelGear 2 User Inteface (Panel)
In order to launch the panel the user should:
- Open Photoshop.
- In Photoshop menu click on
Window -> Extensions -> Fixel PixelGear.
Once done, the PixelGear 2 UI will present itself:
![]()
As can be seen above, the Panel is composed of 3 Tabs for 3 Filters.
By default the first Filter / Tab presented in PixelGear 2 panel is SkinGear. If you want to use EdgeGear or ToneGear, simply click them at the bottom of the panel.
Retouch Skin With SkinGear
To start the retouch process, you need first to create a selection of the skin areas.
Click on the Color Range button to open the Color Range dialog box.
![]()
Select Skin Tones from the drop-down menu inside the Color Range dialog box:
![]()
Use the Fuzziness slider to include or exclude skin tones.
![]()
When done, click OK. This will mark a selection on your image (Marching Ants):
![]()
To convert this selection into a layer mask, click the Create Mask button.
![]()
This will automatically duplicate the Background layer, add a layer mask based on your selection and activate the layer itself, so you can apply the filter in the next step (Do not change the layer’s name, it is necessary for future editing):
![]()
PixelGear has advanced Preset manager. Click on the Presets Menu button in the PixelGear panel in order to open it.
![]()
Select the preset you need for this retouch (More about presets in the bottom of this post).
![]()
The filter is activated automatically with the preset’s parameters. The panel is updated to display those parameters as well.
![]()
Retouching Skin with SkinGear Sliders / Parameters
- Use
Smart Smoothto soften the overall “feel” of the skin. Higher values mean softer skin. This slider should have the largest value of the first 4 sliders. - Use
Preserve SkinFeatures to threshold smoothing strength. Higher values means more original details are maintained. Lower values mean smoother skin. - Use
Remove Skin Defectsto smooth small skin details. - Use
Overall Restoreto control how much detail will be preserved. Higher values mean more details. Lower values mean less details. - Use
Intensityto control the impact of the filter. Higher values mean significant smoothing. Lower values mean milder influence.
Think of these sliders as if they were “layering” the face from large details to small texture details.
For best results, keep values of the first 4 sliders in descending order. Namely Smart Smooth has the highest value, Preserve Skin is next, then Remove Skin Defects and the lowest value is Overall Restore.
The basic thumb rule is – the larger the gap between Smart Smooth and Preserve Skin the smoother the skin.
In the above sample we used our “Beauty” preset.
Fine Tuning of the Mask
After applying the filter, you might find out that some areas, such as eyes, lips and hair, need to be excluded from the filter’s influence. In addition, some skin areas might need to be added to the effected areas.
In order to edit the mask, do as following:
Alt/OptionClick on the mask thumbnail in the layers panel to present the mask.
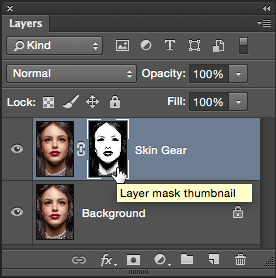
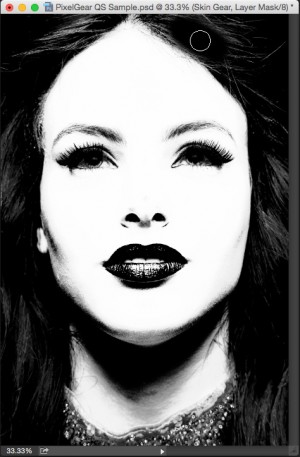
- Choose the
Paint Brushtool.
- Set the
Foreground/Backgroundcolors to default.
- Paint with white on places you want to add to the effected areas; Paint with black on places you want to exclude (use the “X” key to exchange between them).
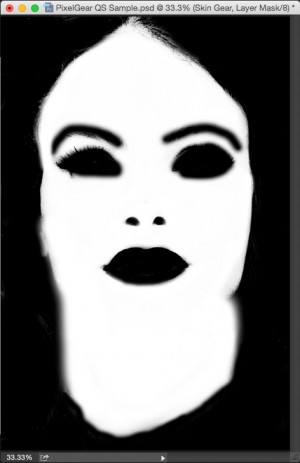
Alt/OptionClick the mask thumbnail to present the colored image. If needed, keep working on the mask. Pay attention to important “character” details, such as smile wrinkles and nostrils. In this example we also excluded the hair.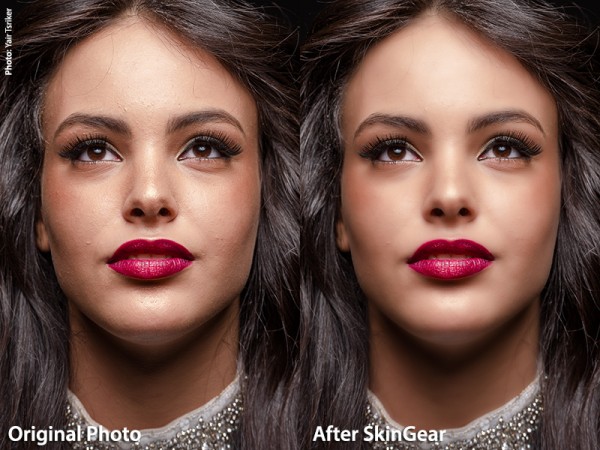
Final Retouch of Skin Defects
Some defects can’t be removed by the filter and must be removed manually.
In order manually remove these defects do as following:
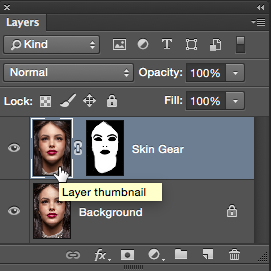
- Activate the layer (Instead of the mask) by clicking its thumbnail in the Layers panel.
- Choose the appropriate retouch tool, the
Spot Healing Brush, theHealing Brushor theClone Stamp Tool.
- Zoom in and remove the defects.

Adding Grain
Sometimes, after smoothing a portrait, the image might not look realistic enough. One way to prevent this is adding some grain to the retouched areas.
In order to do this withing the SkinGear workflow is as follows:
- Drag the Grain slider to add grain to the image.
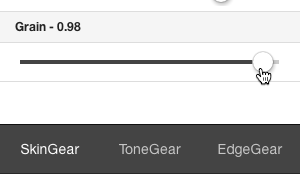
- A
Grainlayer will be added automatically.
- Note that the grain layer effects only retouched areas (It uses a duplicated mask of the
SkinGearlayer). - If you would like to use a different grain level, simply drag the slider to a different value.
Using SkinGear Presets
SkinGear comes with 3 pre defined presets.
In order to use the Presets follow these steps:
- Accessing the Presets Menu is done by click on the 3 stripes button (Hamburger Menu) at the top of the
PixelGearpanel.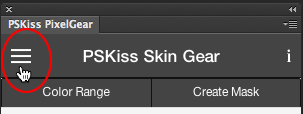
- Click on the preset you want to use.
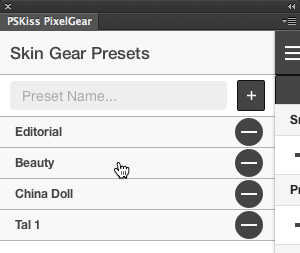
The Pre Defined Presets are as following:
- Editorial – Uses low smoothing values and basic intensity. Suitable for official portraits and editorial usage.
- Beauty – Uses medium smoothing values and higher intensity. Suitable for commercial beauty and fashion photos.
- China Doll – Uses high smoothing values and high intensity. Use this one when you want that “China Doll” face effect.
The user can create his own presets as well:
- Set the filter sliders directly in the panel to taste (Following the guide line of course).
- Open the Preset Menu as described above.
- In the Text Box write the Preset Name and click on the
+button.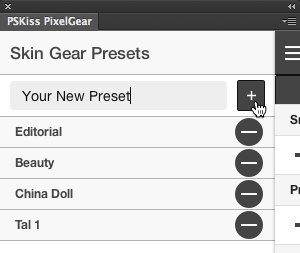
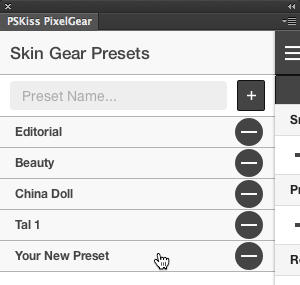
- To remove a preset from the list, click the
–button next to its name.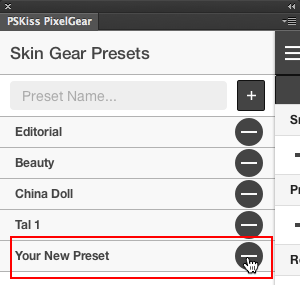
- Click
OKand it will be removed from the presets list.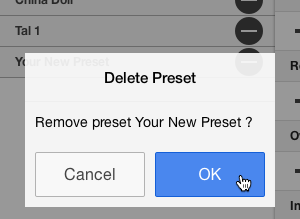
Shadows, Highlights and Global Contrast Enhancement with ToneGear
ToneGear is the tool to have a full control on the tonality of the image. It allows the user easily adapt any tonal style wanted.
Basic workflow to utilize ToneGear is:
- Select the
ToneGearfilter, by clicking its name at the bottom ofPixelGearpanel.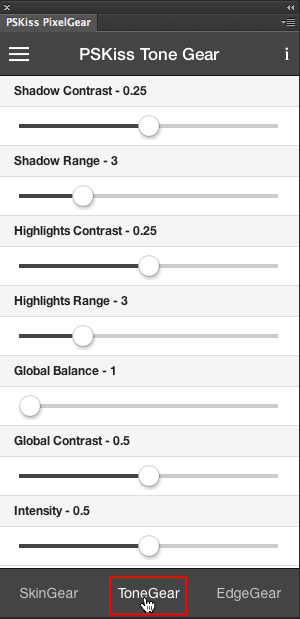
- Click on the
Presets Menubutton in theToneGearpanel and select the preset to apply.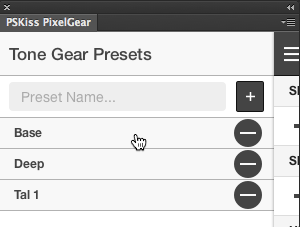
- This will automatically create a new layer based on a merge of the current layers in your image. The new layer will be named
Tone Gear(Do not change this name, it is necessary for future editing).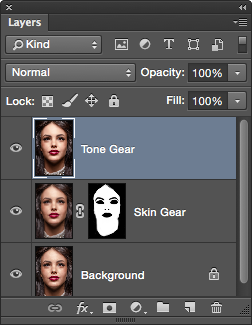
- Now make the needed adjustments using the sliders.
Tone Gear layer by dragging one of ToneGear’s sliders. Using a preset to initiate the process is not mandatory.Control Contrast with ToneGear
Shadows Contrastedits contrast in darker parts of the image. Higher value means lighter shadows.Shadows Rangesets the tonal range for shadows. Higher value increases tonal range of shadows and more areas will be effected by Shadows Contrast changes.Highlights Contrastedits contrast in brighter parts of the image. Higher value means darker highlights.Highlights Rangesets the tonal range for highlights. Higher value increases tonal range of highlights and more areas will be effected by Highlights Contrast changes.Global Contrastedits contrast of the entire tonal range of the image. Higher value means more contrast.Global Balancedetermines the general influence on image. Higher value means overall darkening.
Adding some Drama is simple:
Using ToneGear Presets
ToneGear comes with 2 pre defined presets.
In order to use the Presets follow these steps:
- Accessing the Presets Menu is done by click on the 3 stripes button (Hamburger Menu) at the top of the
PixelGearpanel.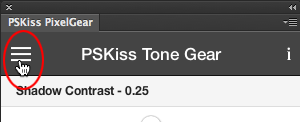
- Click on the preset you want to use.
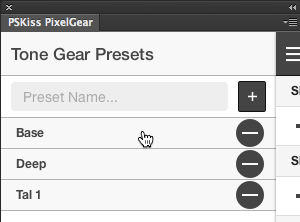
The Pre Defined Presets are as following:
- Base – Adding gentle touch of contrast.
- Deep – Adding contrast to the deep shadows and highlights.
The user can create his own presets as well:
- Set the filter sliders directly in the panel to taste (Following the guide line of course).
- Open the Preset Menu as described above.
- In the Text Box write the Preset Name and click on the
+button.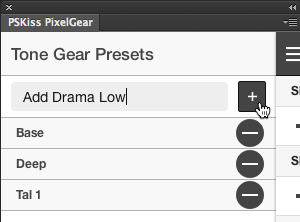
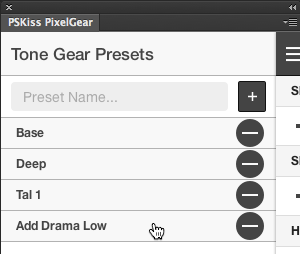
- To remove a preset from the list, click the
–button next to its name.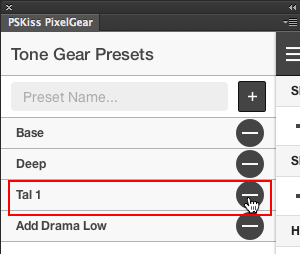
- Click
OKand it will be removed from the presets list.
Sharpen and Enhance Edges with EdgeGear
EdgeGear is the nifty little tool to give the image edge above all others :-). EdgeGear is smart and simple utilizing proprietary algorithm to enhance image edges.
Basic workflow to utilize EdgeGear is:
- Select the
EdgeGearfilter, by clicking its name at the bottom ofPixelGearpanel.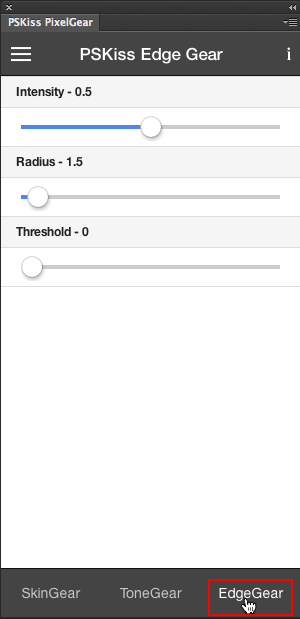
- Click on the
Presets Menubutton in theEdgeGearpanel and select the preset to apply.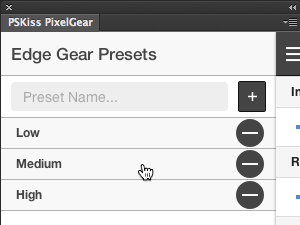
- This will automatically create a new layer based on a merge of the current layers in your image. The filter also adds a layer mask. It is an inverted version of Skin Gear’s mask, so only non smoothed areas will be sharpened. The new layer will be named
Edge Gear(Do not change this name, it is necessary for future editing).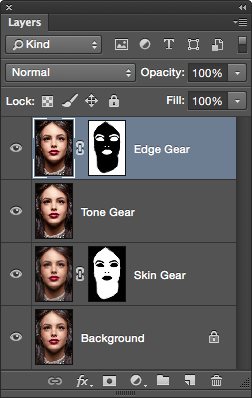
- Now make the needed adjustments using the sliders.
Edge Gear layer by dragging one of EdgeGear’s sliders. Using a preset to initiate the process is not mandatory.Enhancing Edges with EdgeGear
Intensity– Sets the intensity of edge enhancement. Higher values mean stronger influence of filter.Radius– Sets width of edges effected by filter. Higher values mean wider edges are effected.Threshold– Sets filter less affect noise. Lower values mean all image is effected. Higher values direct the filter to skip noise and work on edges only. Use this slider with high ISO images.
Using EdgeGear Presets
EdgeGear comes with 3 pre defined presets.
In order to use the Presets follow these steps:
- Accessing the Presets Menu is done by click on the 3 stripes button (Hamburger Menu) at the top of the
PixelGearpanel.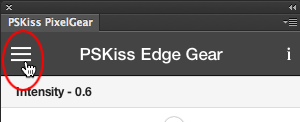
- Click on the preset you want to use.
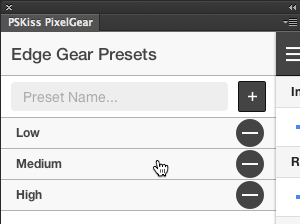
The Pre Defined Presets are as following:
- Low – Subtle setup of edge enhancement; Recommended for online images.
- Medium – Stronger edge enhancement; Recommended for printed images (offset or digital).
- High – Quite a rough setup. Recommended for newspaper printed images or for special effects.
The user can create his own presets as well:
- Set the filter sliders directly in the panel to taste (Following the guide line of course).
- Open the Preset Menu as described above.
- In the Text Box write the Preset Name and click on the
+button.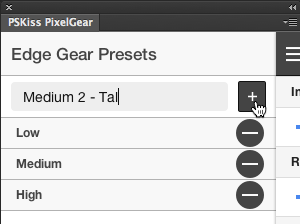

- To remove a preset from the list, click the
–button next to its name.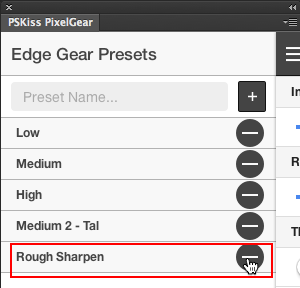
- Click
OKand it will be removed from the presets list.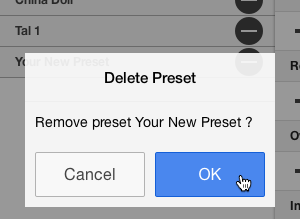
The following image was created using Medium preset:
![]()
Sharpening vs. Enhancement
When you use small Edge Radius values and high Intenisty values, you sharpen the edges as demonstrated in the image above. If you flip the order, you get edge enhancement instead:
Summary
Integrating all 3 filters yields:
![]()
All the above is also available in a video:
Resources
- Fixel PixelGear 2 Installation Guide.
- PSKiss Blog Post - Color and Retouch – Fast Solutions.
- PSKiss Blog Post - PSKiss PixelGear 2 – QuickStart Guide.
- PSKiss Blog Post - PSKiss Pixel Gear Pro 1.5 – Free Tutorial.
Tutorial about the previous version ofPixelGear. Yet everything is still valid.
Key Words: Fixel Algorithms, Fixel, Fixel PixelGear, Image Enhancement, Image Contrast, Image Sharpening, Skin Retouching, Skin Smoothing, Tonal Enhancement, Contrast Enhancement, Edge Enhancement, Edge Sharpening, Photoshop, Plug In, Photoshop Plug In.